Customer Engineering Enablement Manager
A comprehensive sandbox package manager for enablement programs.
Overview
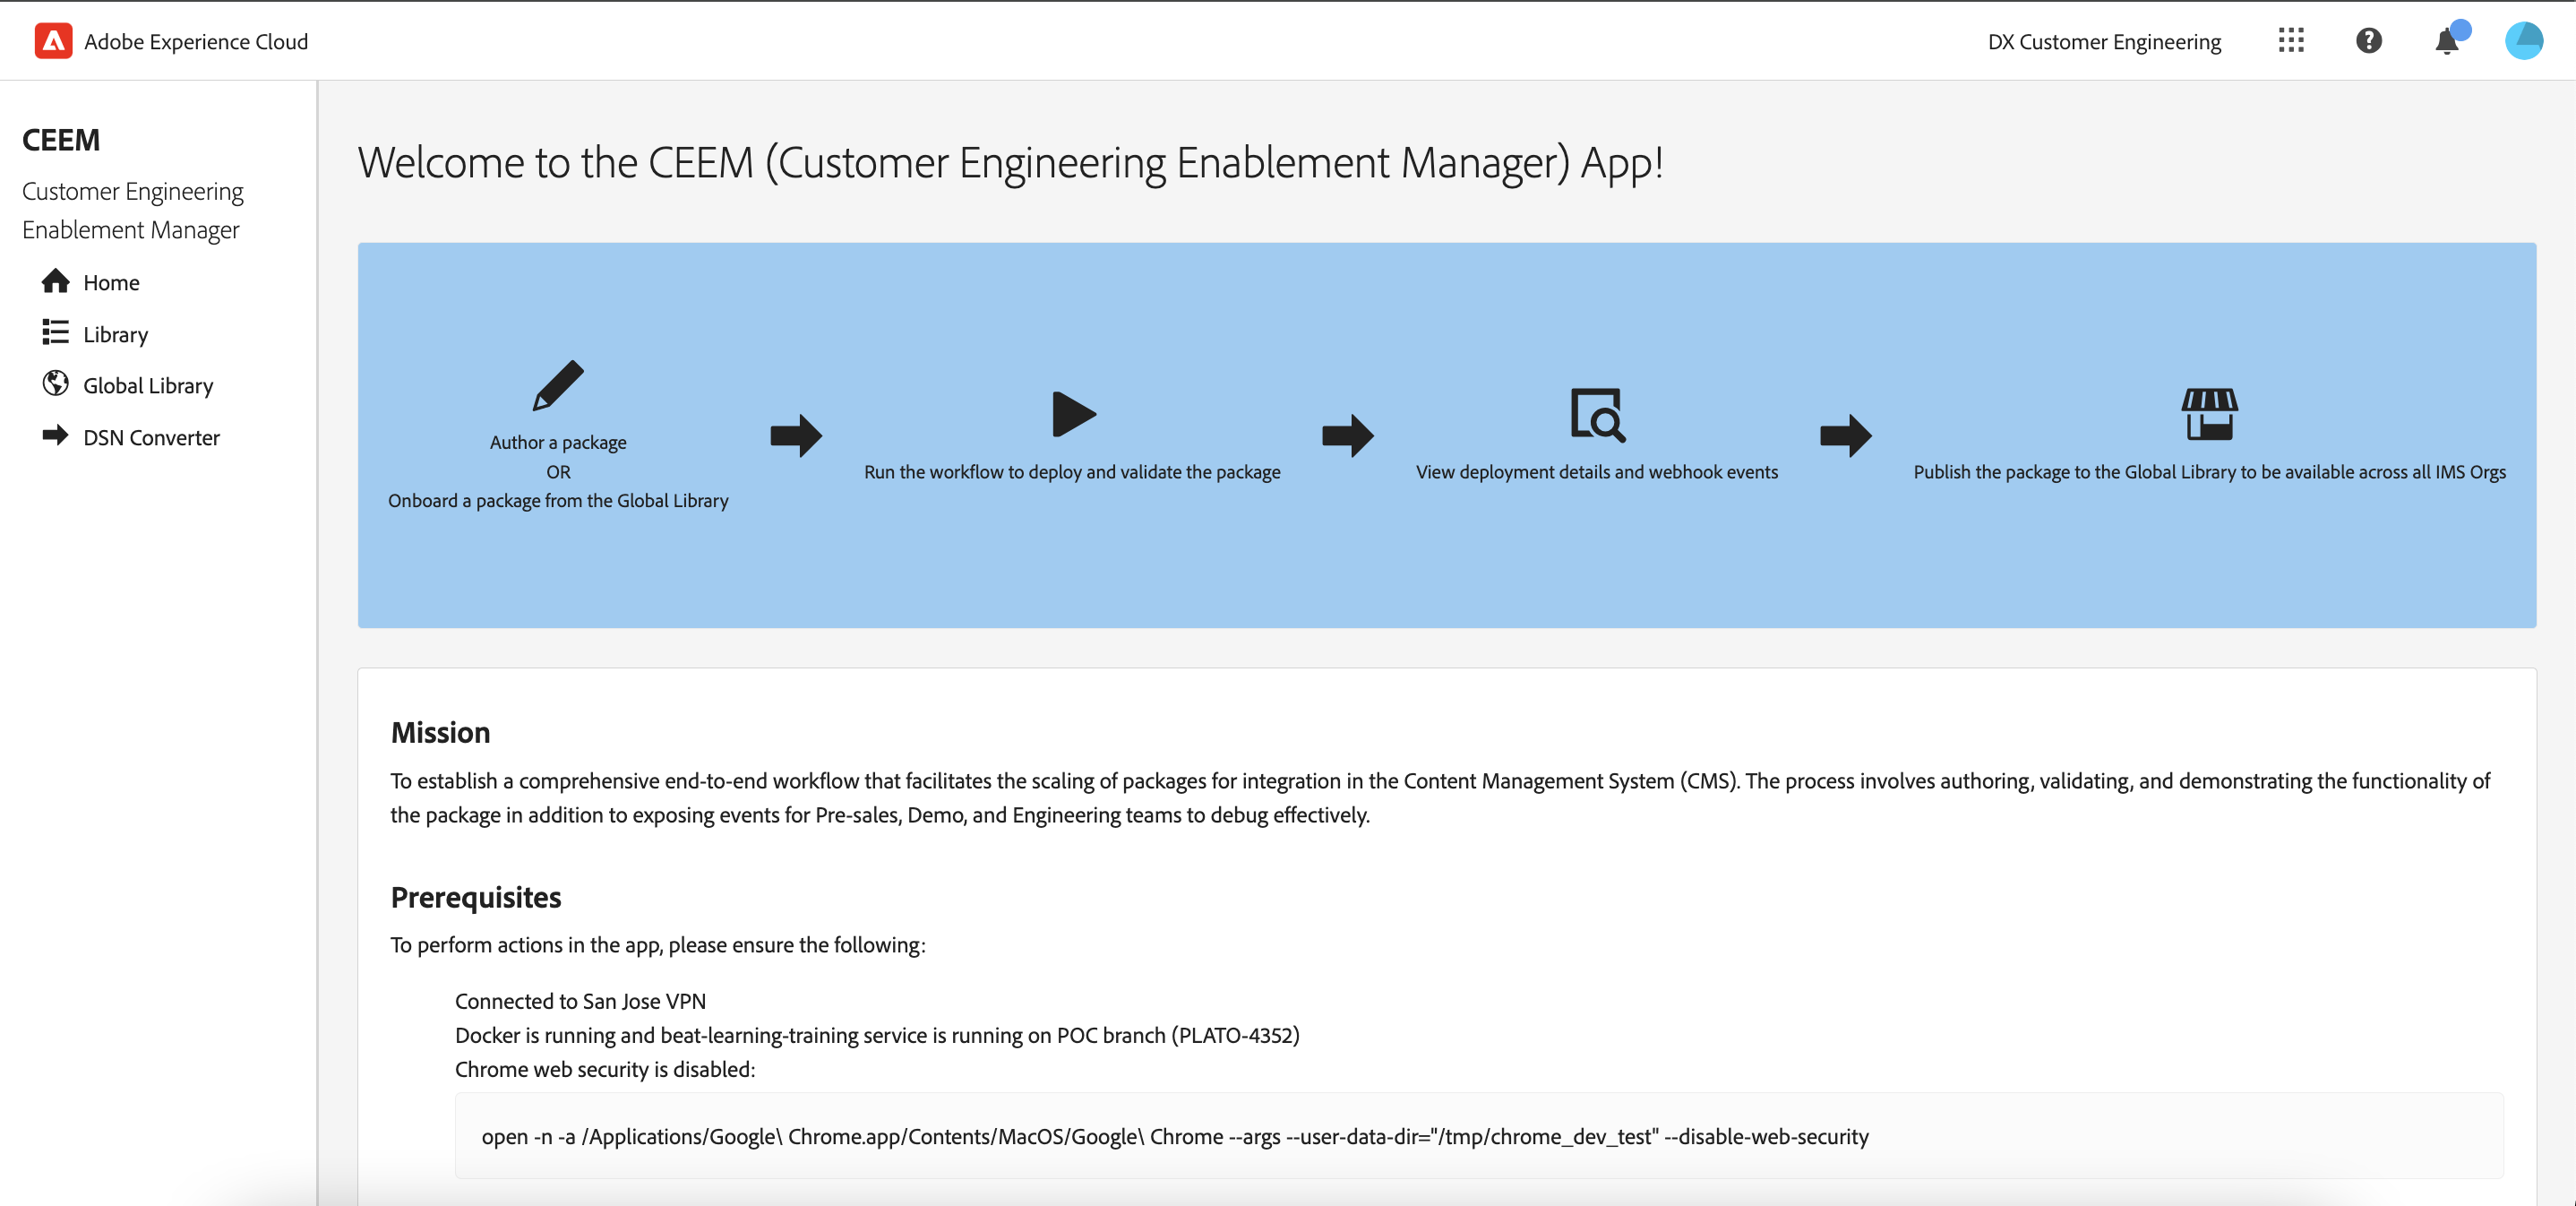
Enablement programs for Adobe Experience Platform require sandbox packages to be created, deployed, and validated for training use. This process is time-intensive and lacks a central UI. As a result, Pre-Sales, Demo, and Engineering teams face challenges in efficiently debugging and publishing packages for broader use within the Customer Engineering team.Goals
- Build a solution that allows customers to seamlessly execute the end-to-end package workflow.
- Accelerate sandbox provisioning and deployment for Adobe Experience Platform enablement programs.
- Allow packages to be shared across orgs.
Role
UX Designer and Developer | Wireframes, Prototyping, UI/UX Research, Front-End Development and API OptimizationScope
August 2024 - CurrentTools
React, TypeScript, React Spectrum (React implementation of Adobe’s design system), Unified Shell (Adobe’s UI framework for internal apps), HTML/CSSExploration
Personas
- Sales
- Solution architect
- Consultant
Software Dependencies
Competitive Analysis
We explored DSN (Dynamic System Network), a similar tool developed to manage packages, however, we decided it wasn't robust and comprehensive enough to cover our use cases.Summary of pain points:
- DSN is not a robust and comprehensive tool for package management
- There is no UI for services such as web hook events and testing
- Packages cannot be published and shared across IMS orgs
Design Process
Functional use cases:
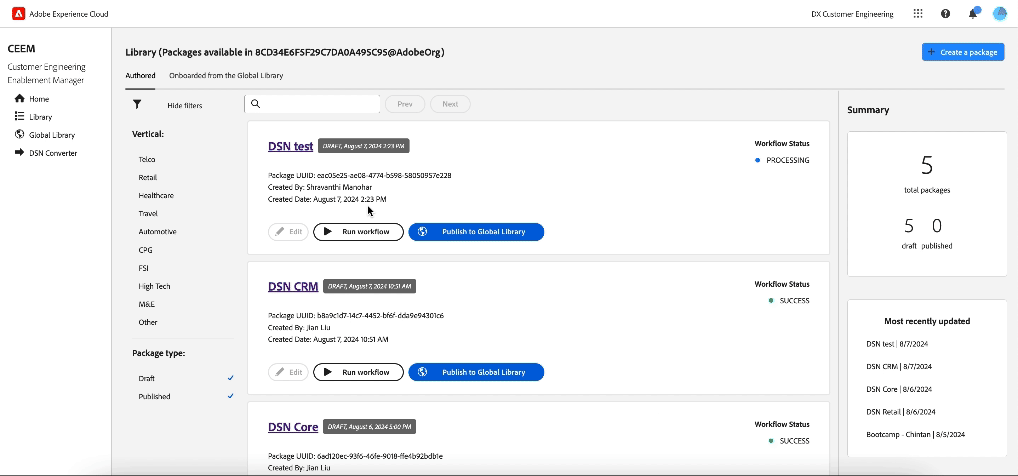
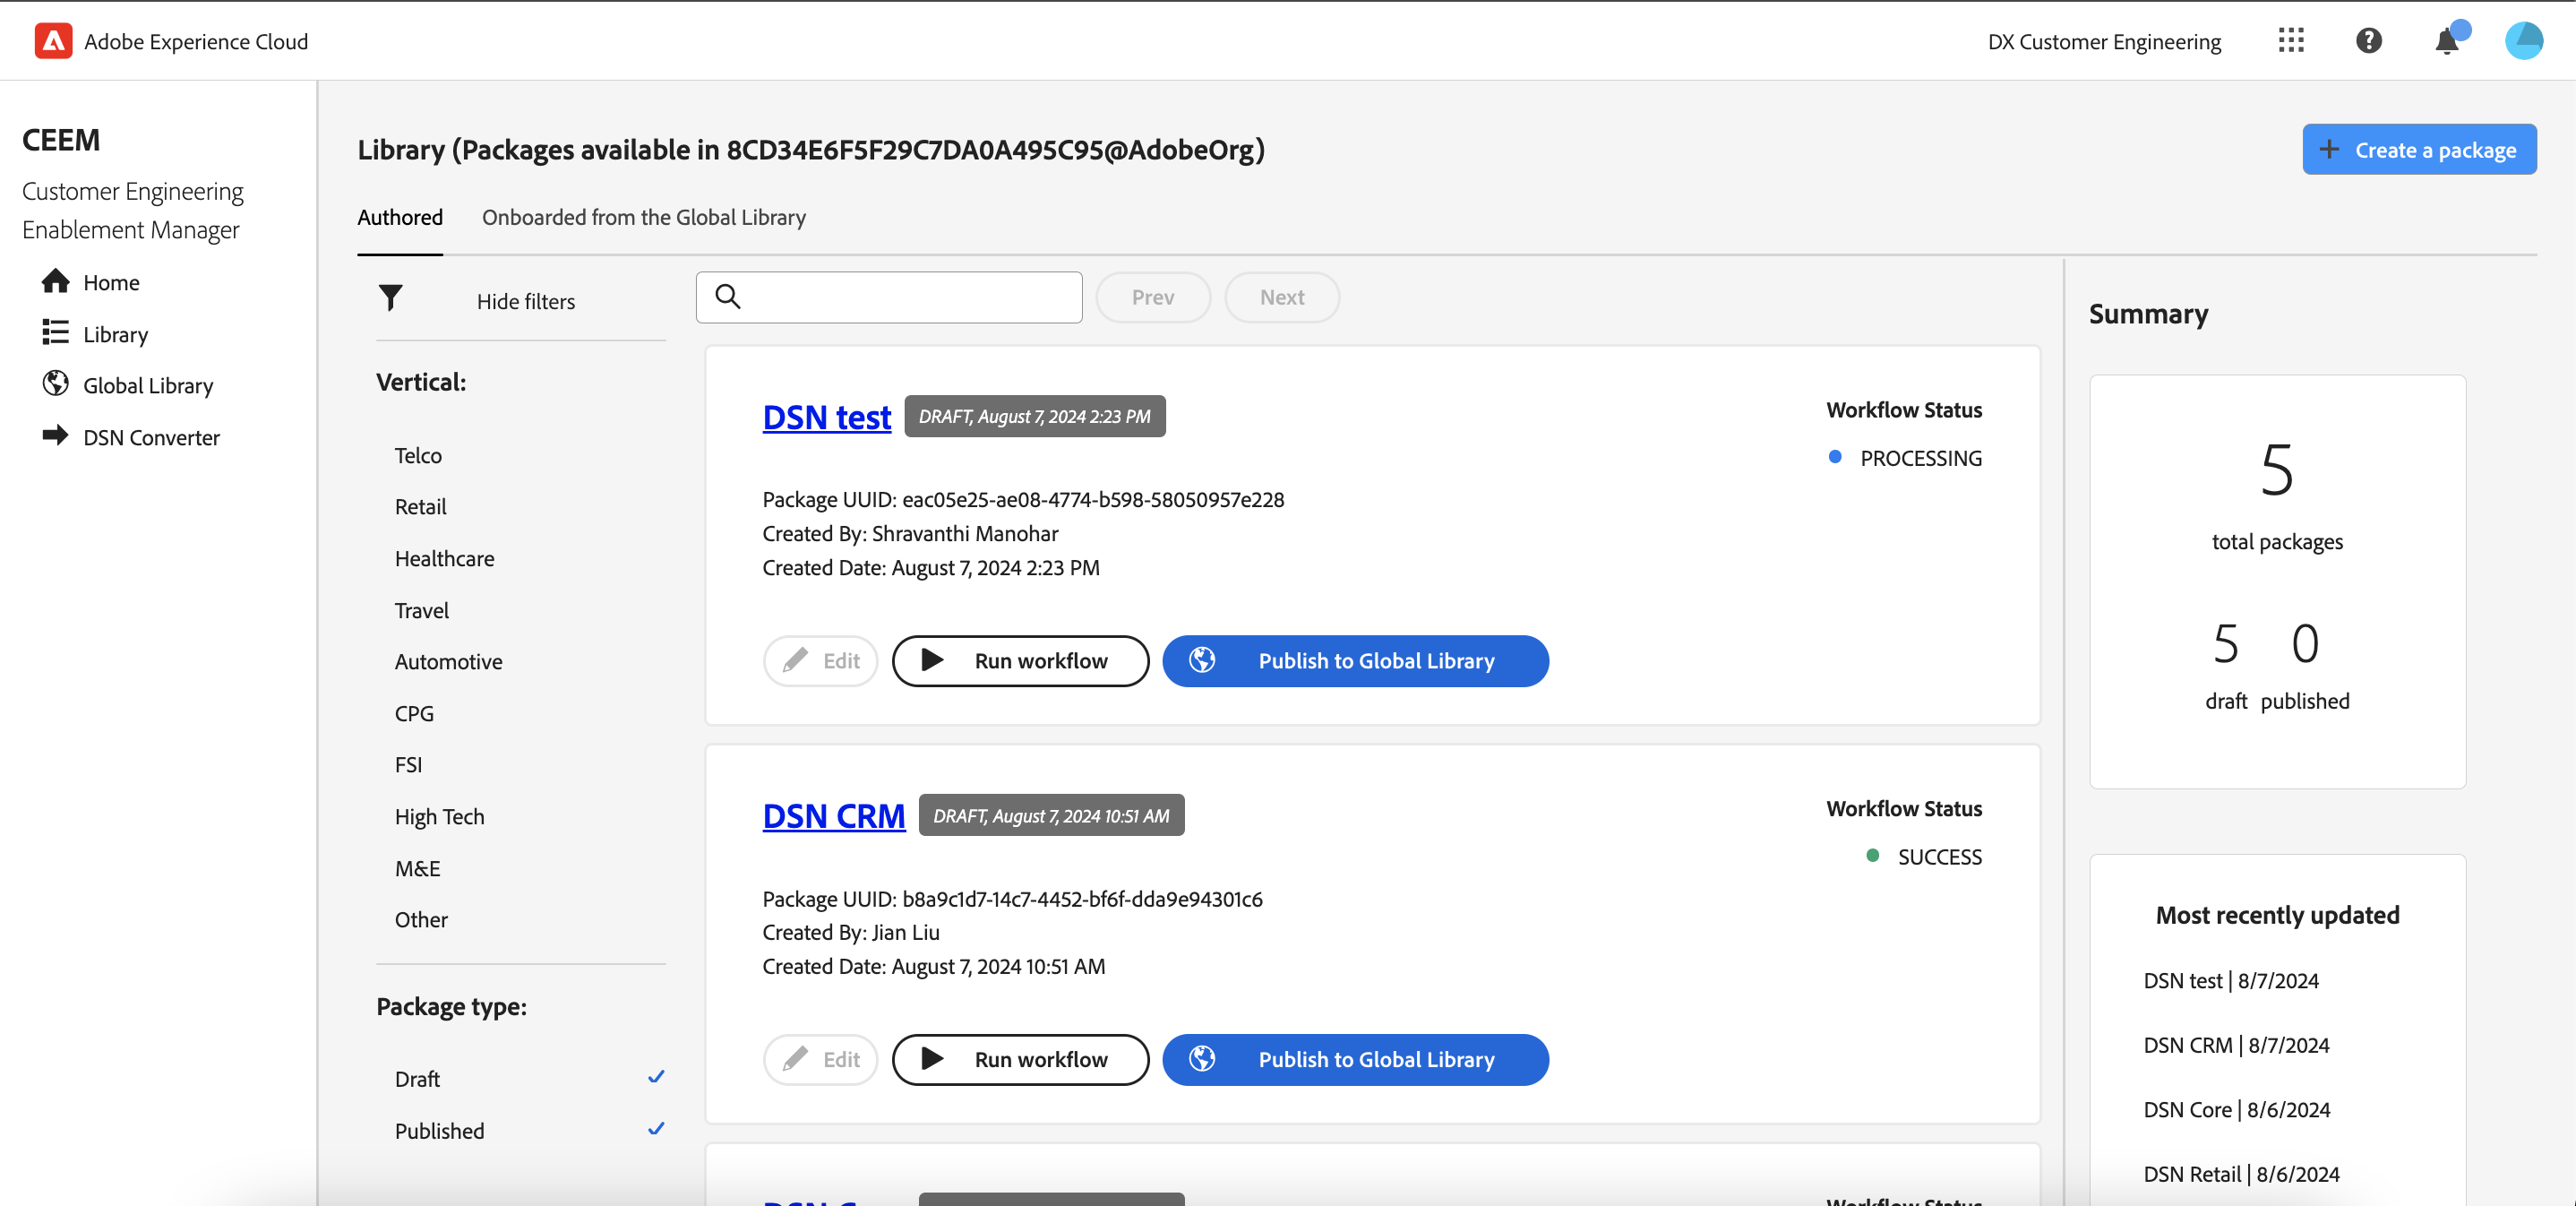
- View a list of available packages in IMS org
- View a list of available packages in the Global Library
- Onboard a package from the Global Library to current IMS org
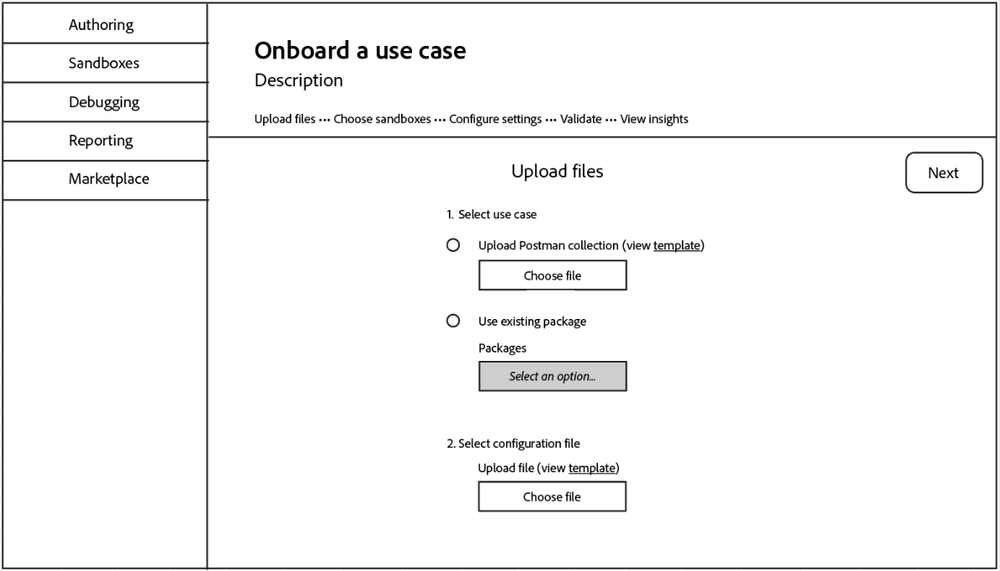
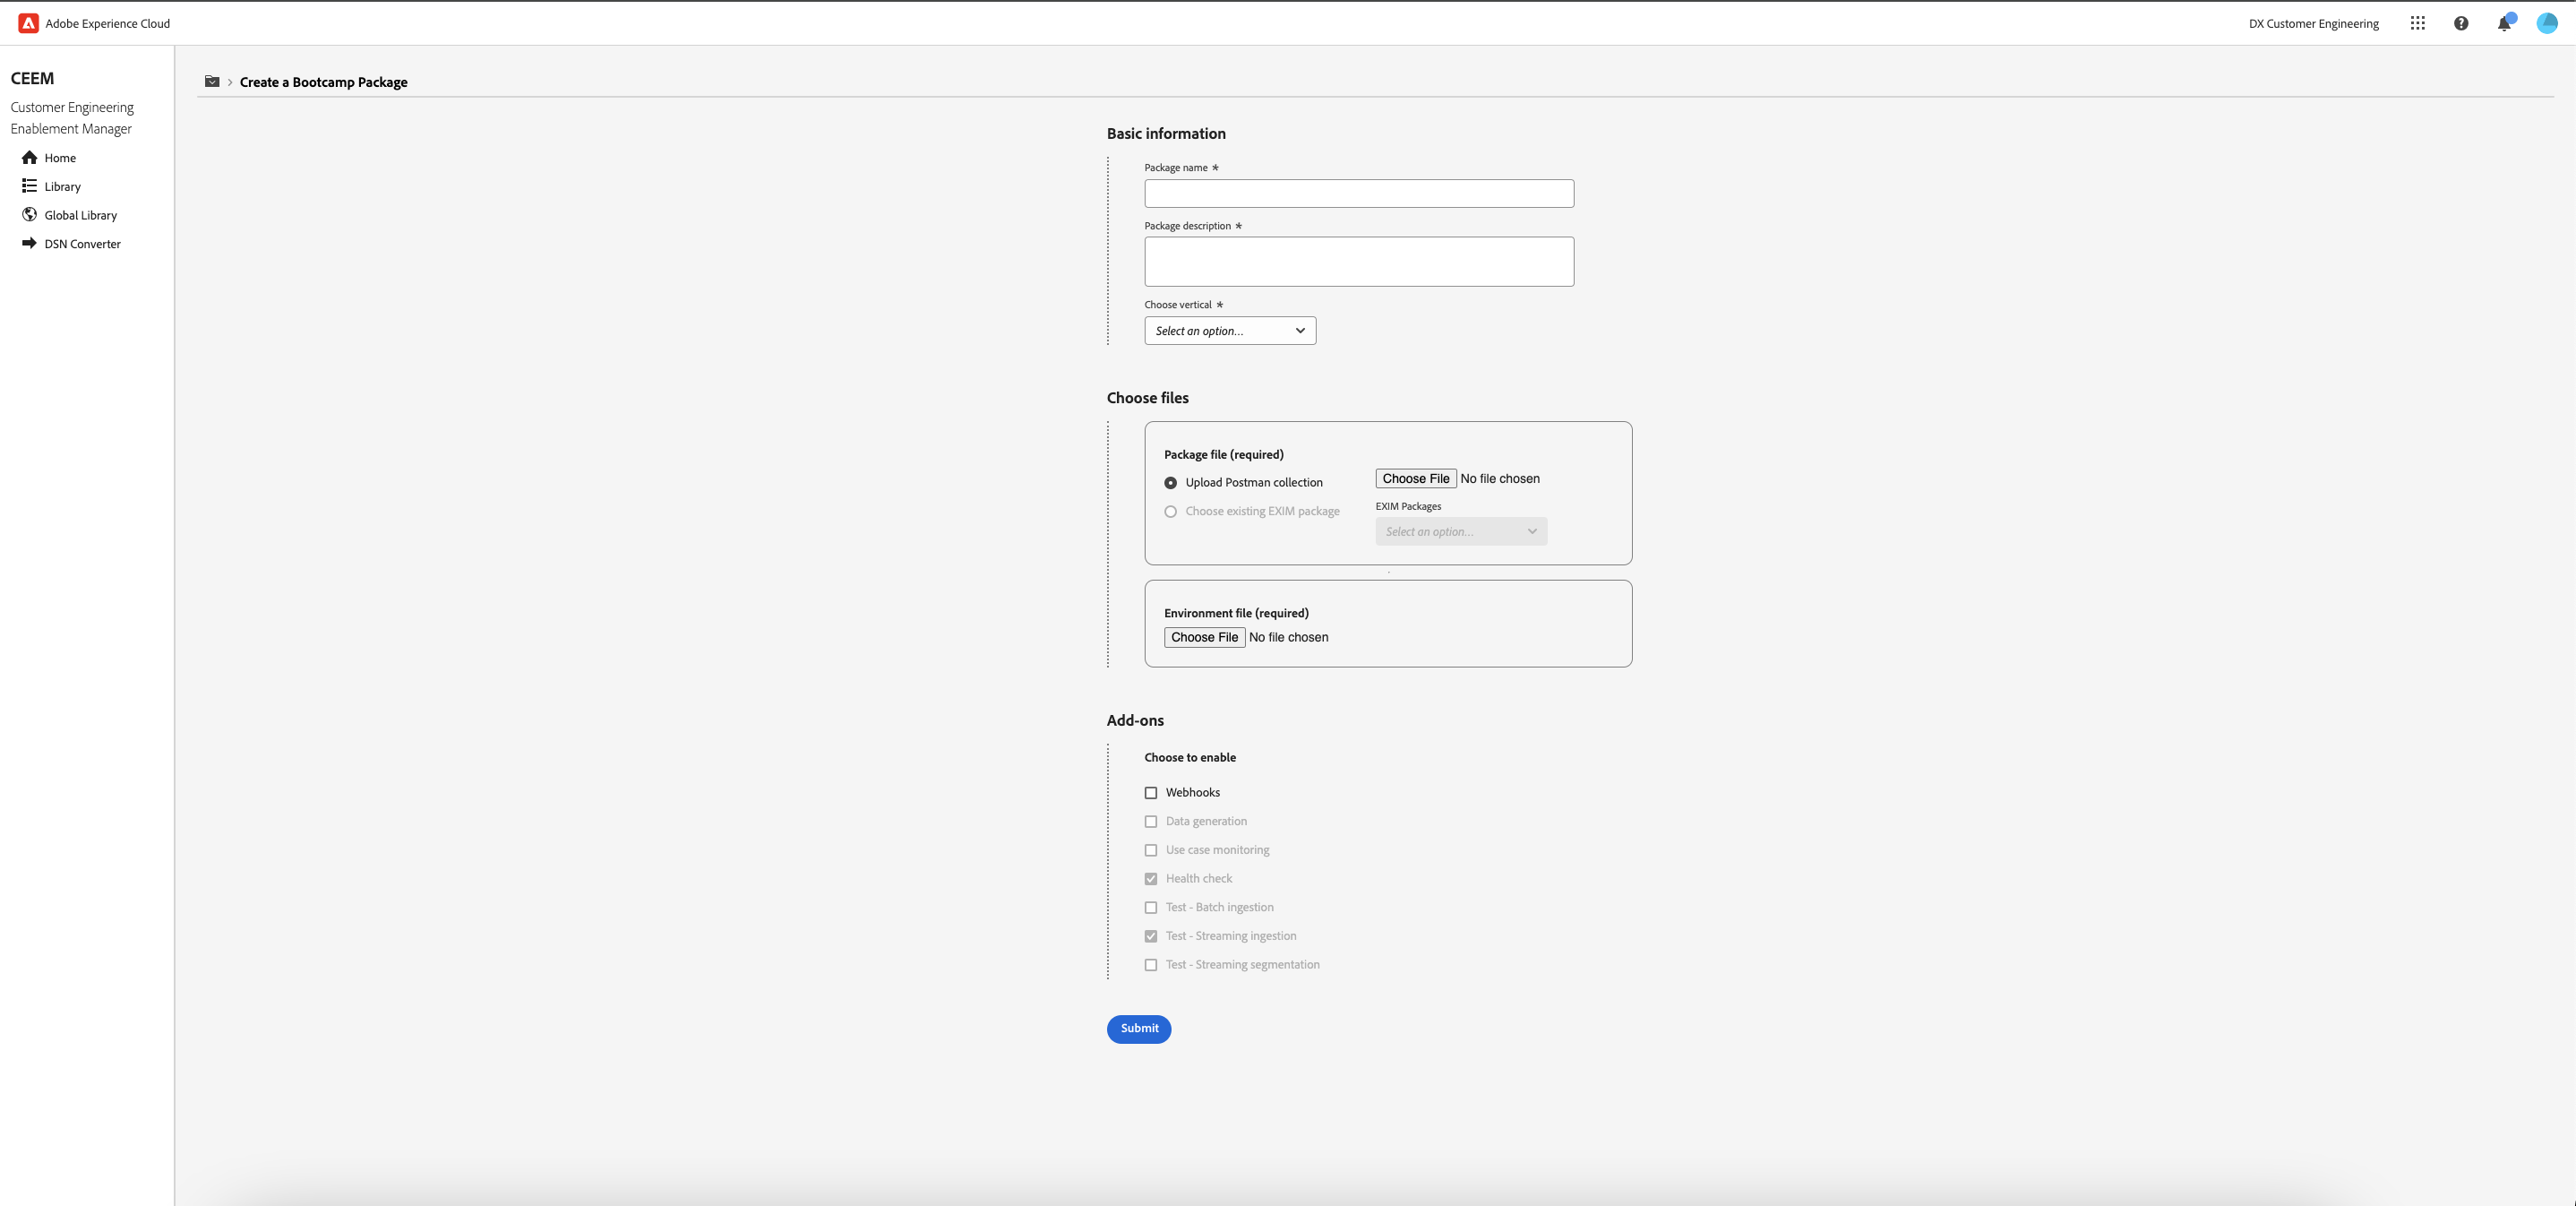
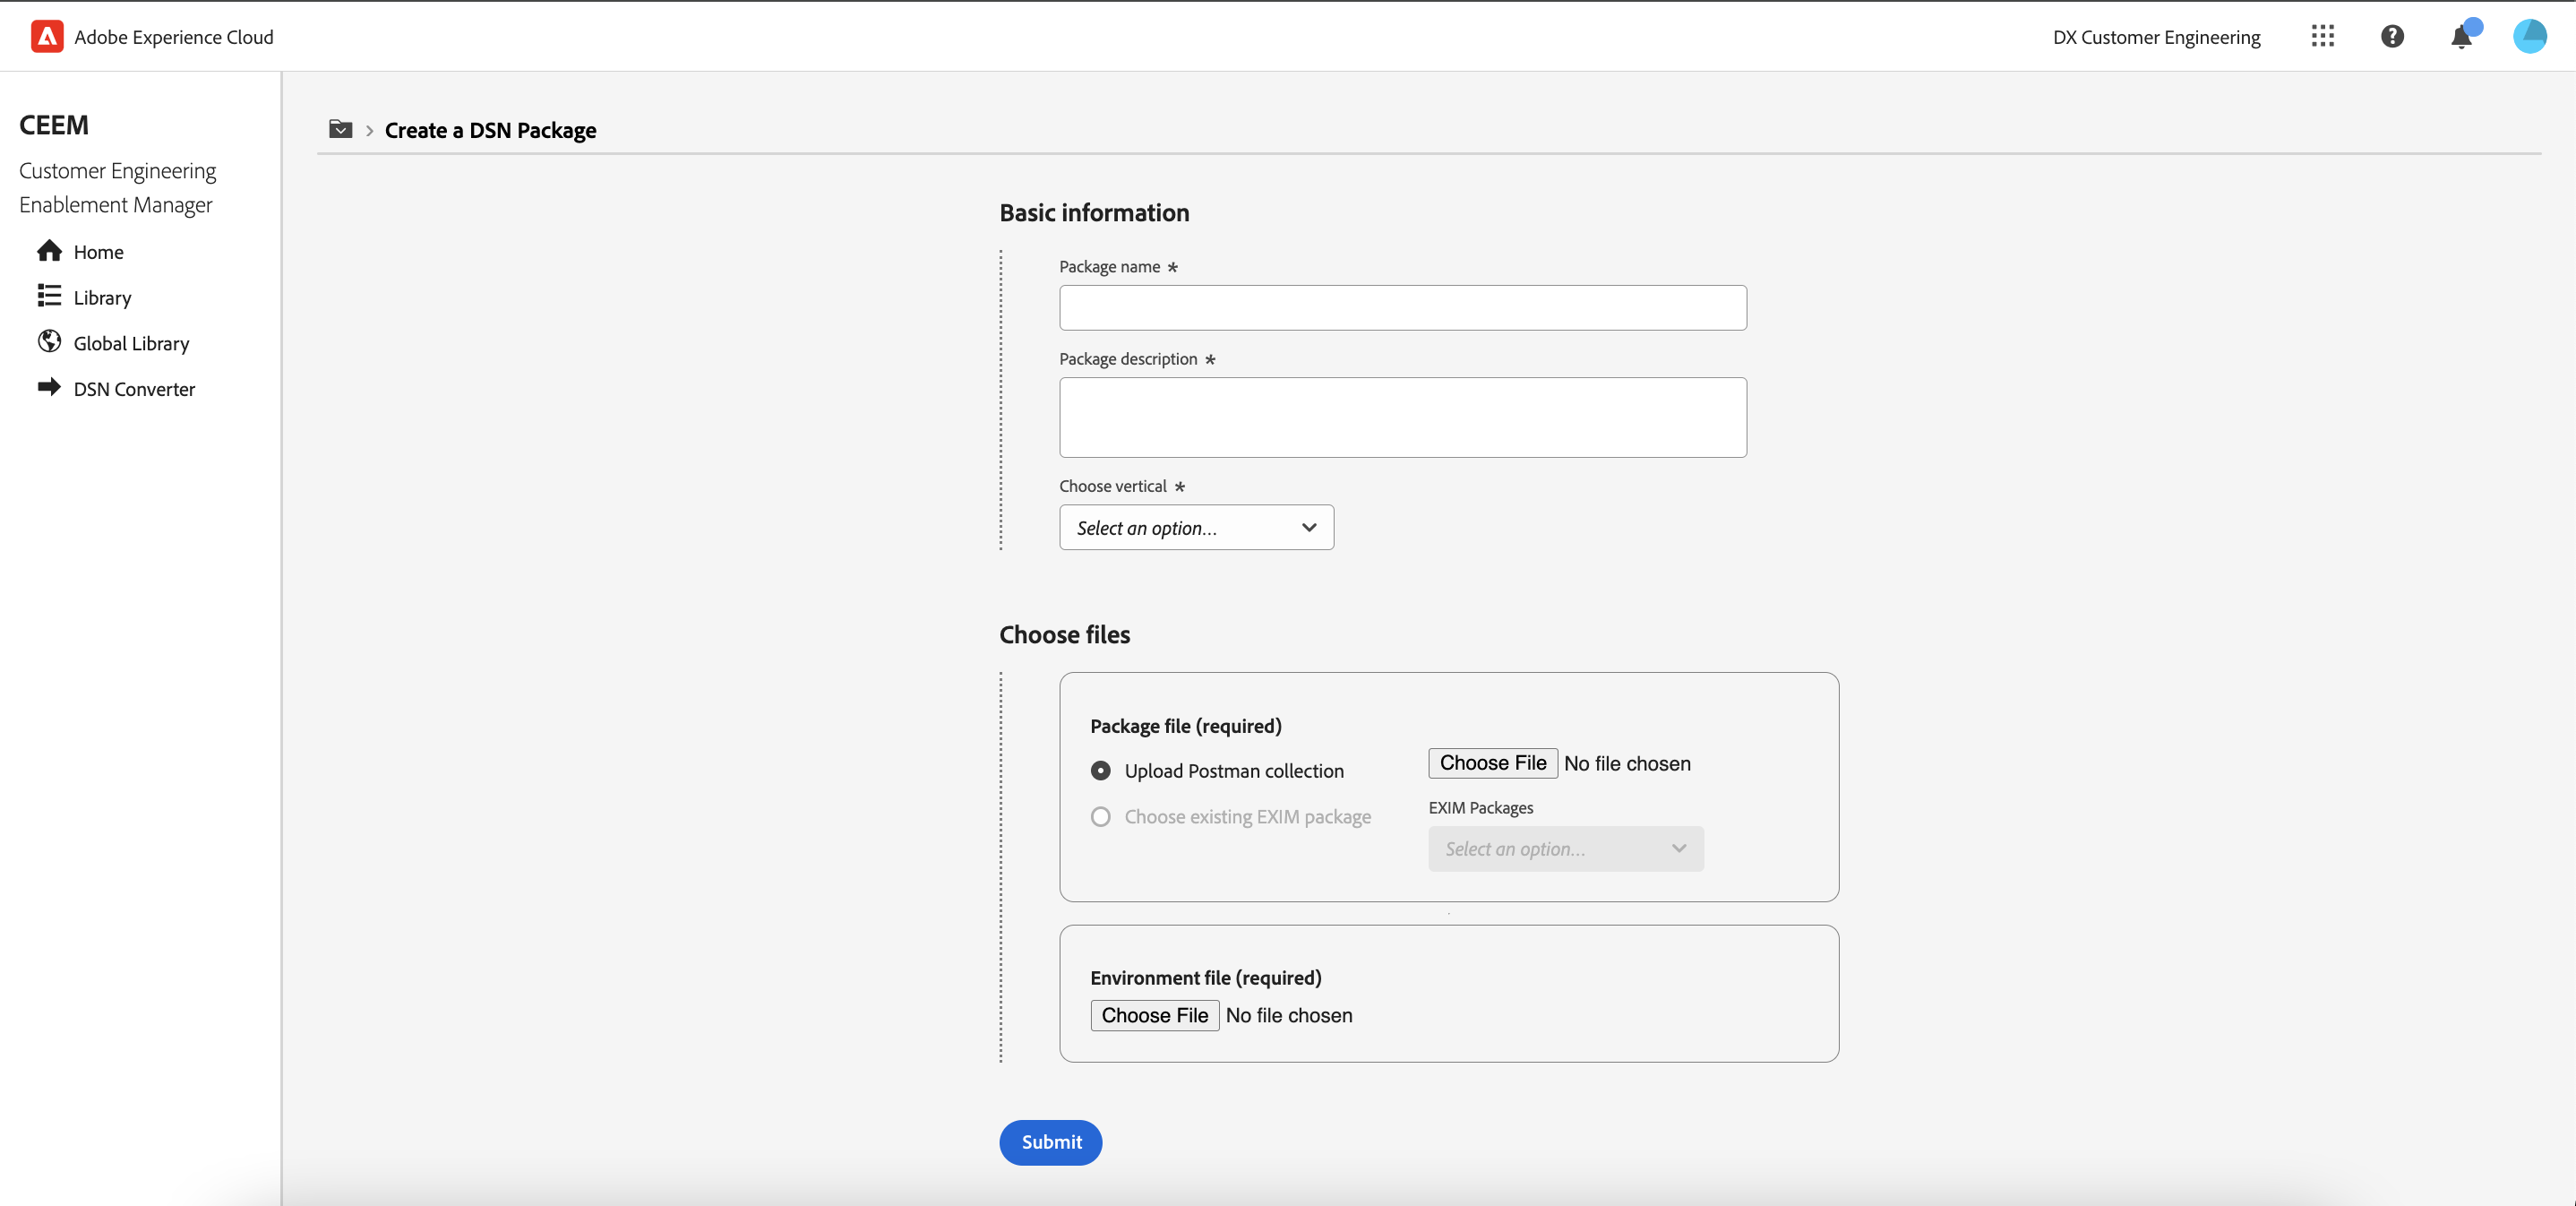
- Create a package that is either: 1) DSN, 2) Bootcamp, or 3) General
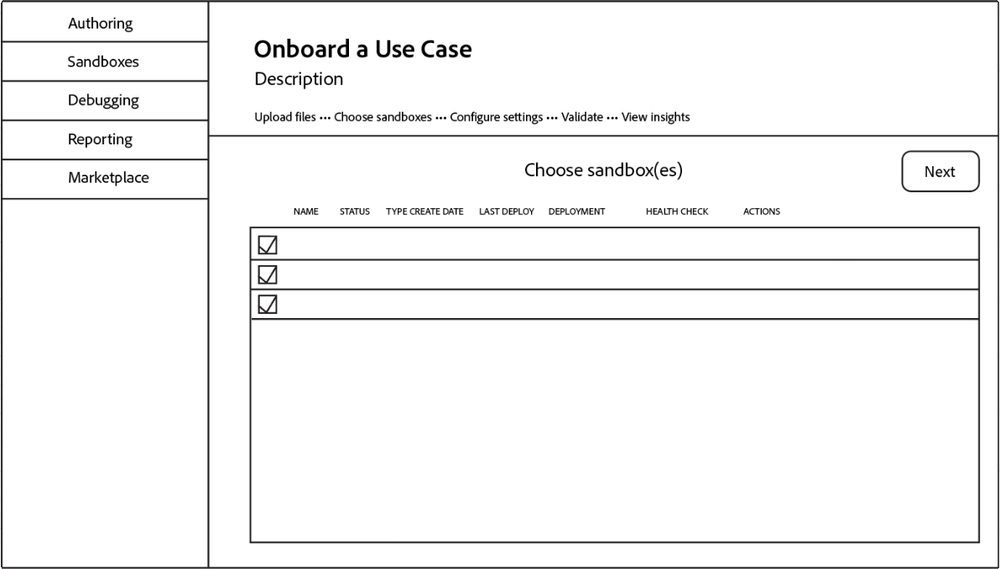
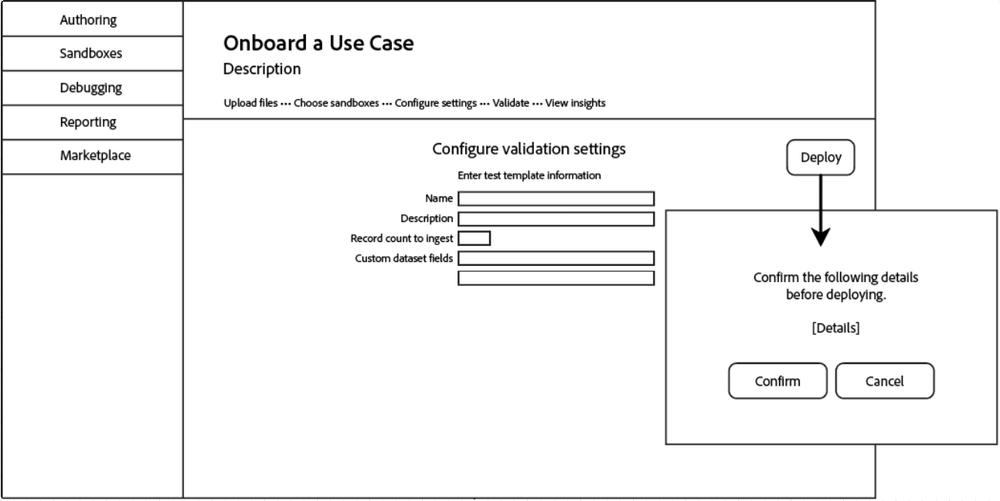
- Deploy a package for testing
- View package testing results and progress
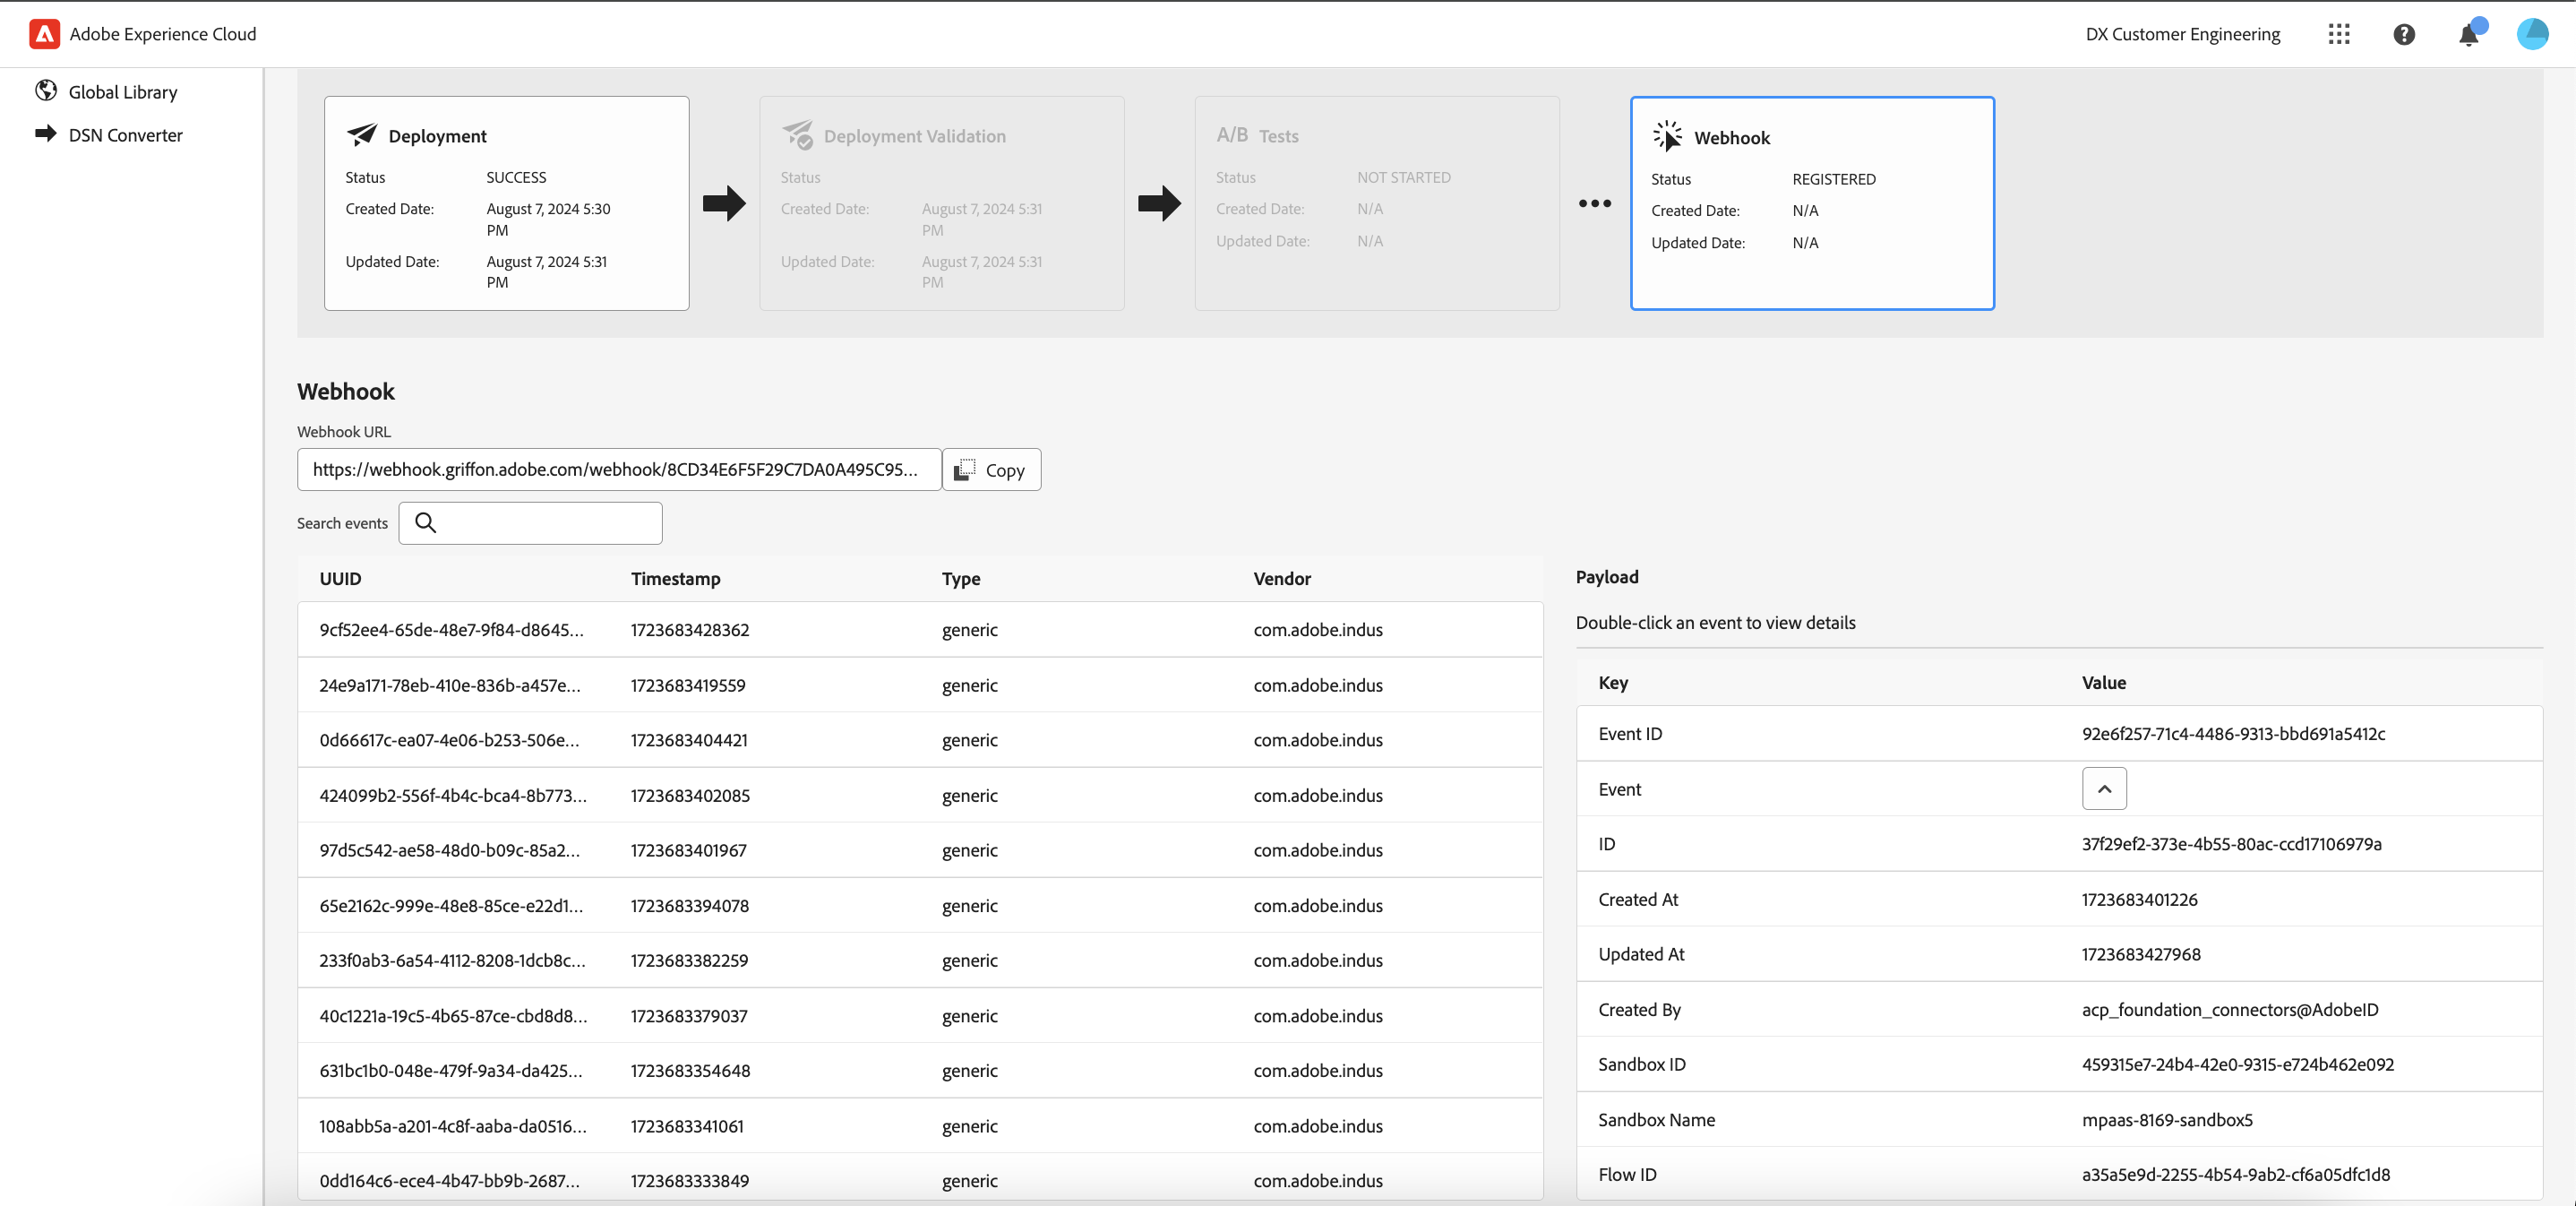
- View web hook events for debugging
- Publish a package to the Global Library
Version 1
Version 2
| Improvement | Before | After |
|---|---|---|
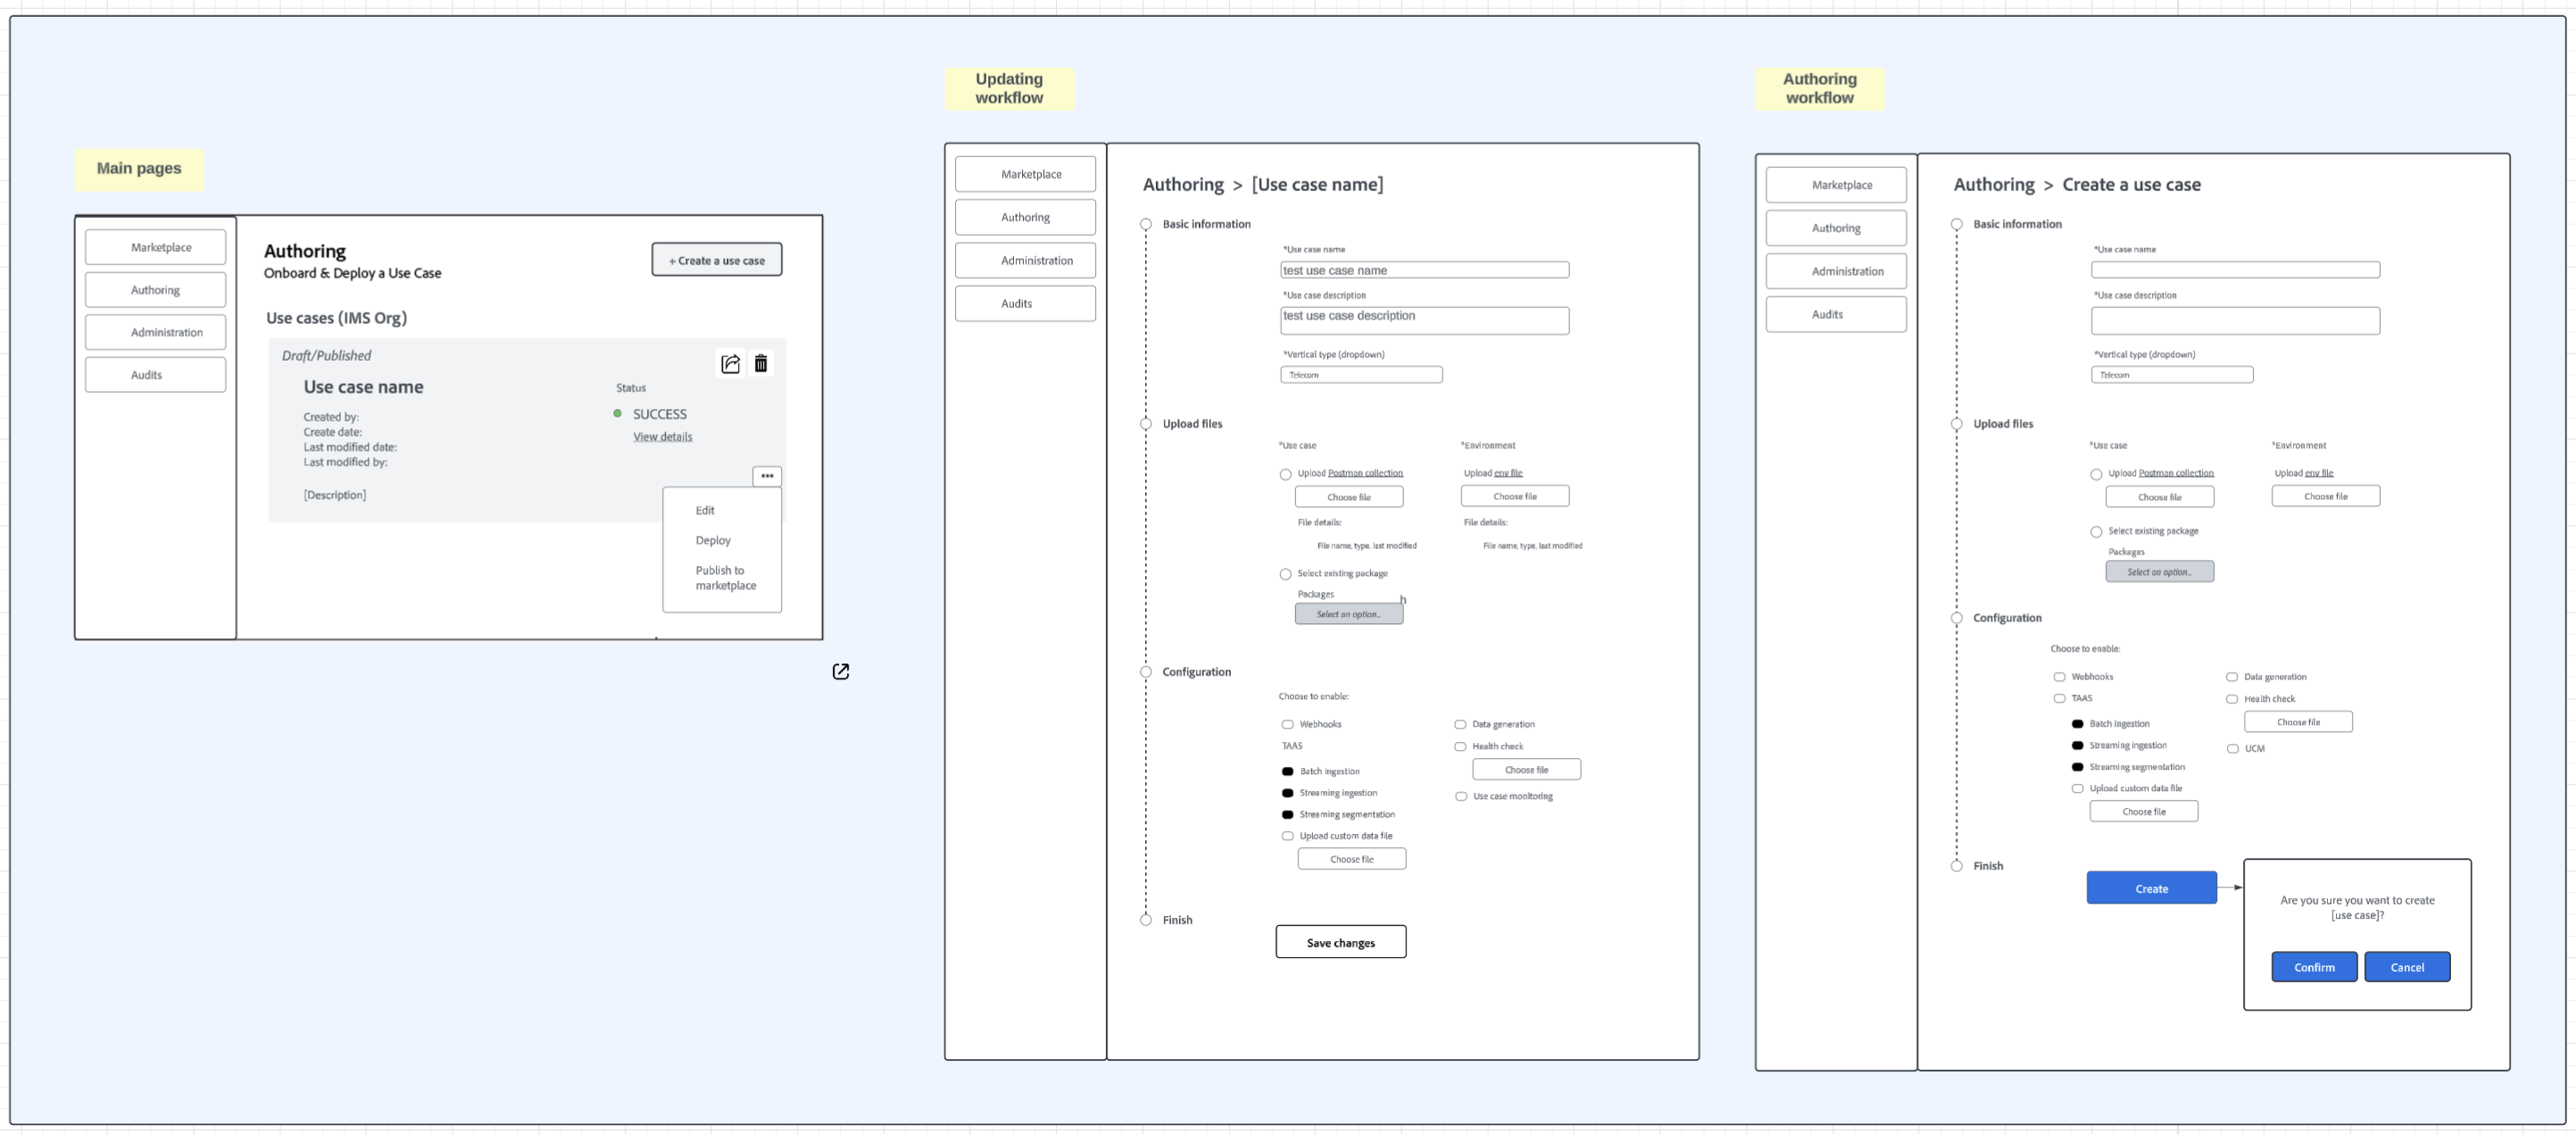
ProblemUsers cannot view or access the packages they created or onboarded.SolutionDisplay a list of packages and their corresponding actions in ‘Authoring'Thought ProcessI initially planned to separate the authoring workflow and authored packages into different tabs but later combined them into a single page for better consistency. The package creation process was streamlined into three steps, removing the need for a separate tab. Additionally, the team preferred to differentiate authored and onboarded packages from those in the 'Marketplace' (now called the 'Global Library'). In the 'Authoring' section, users now immediately see a list of packages they can edit, deploy, or publish to the 'Marketplace.' A 'Create a use case' button in the top right allows quick package creation, consolidating package management into one cohesive and user-friendly interface. | 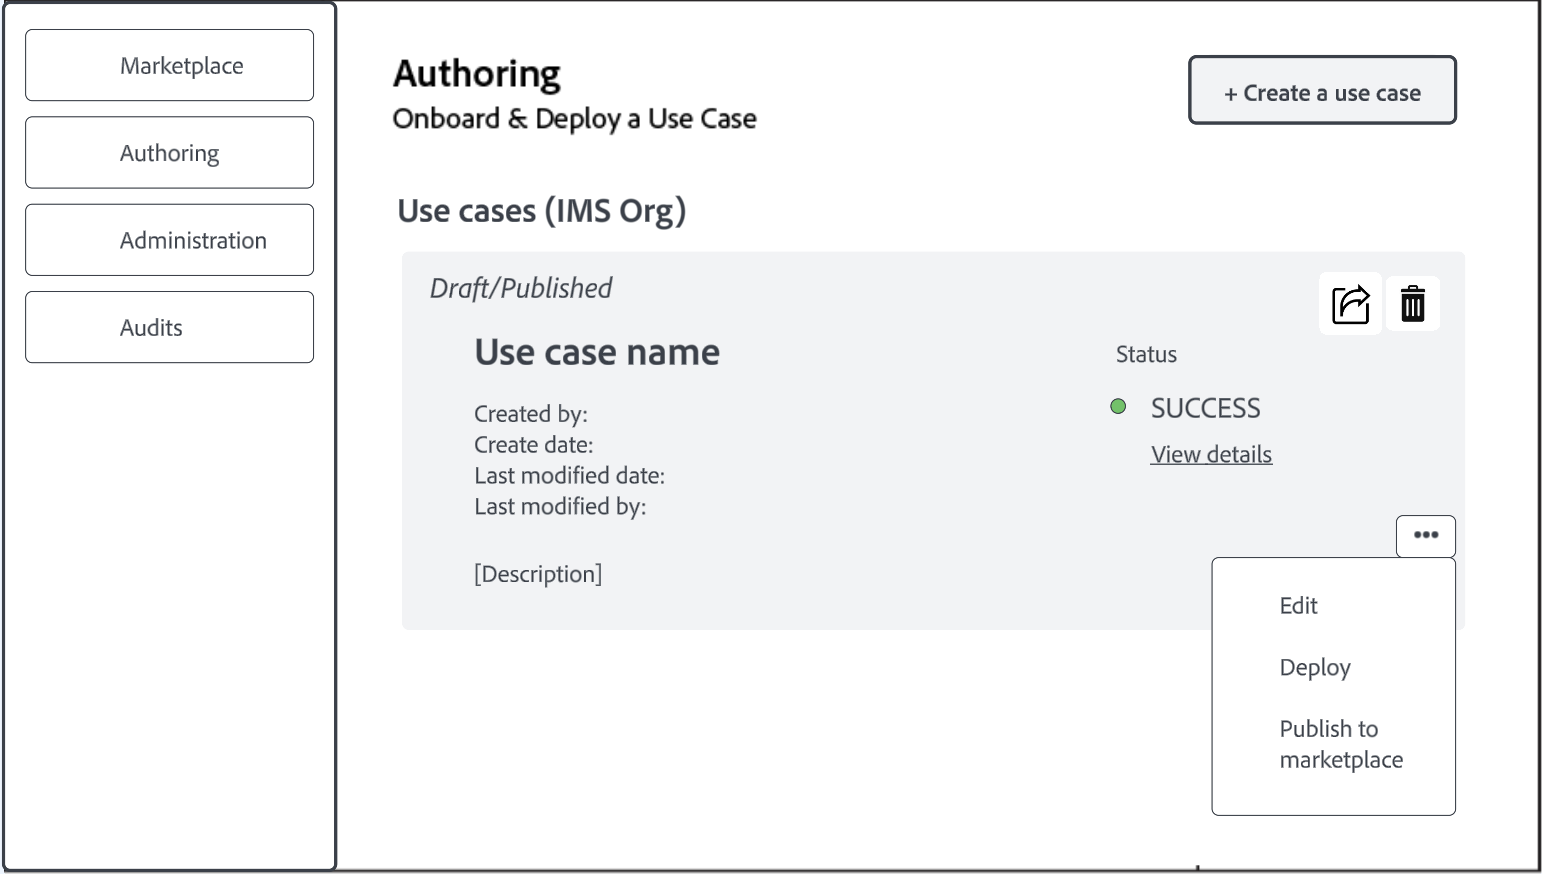 | |
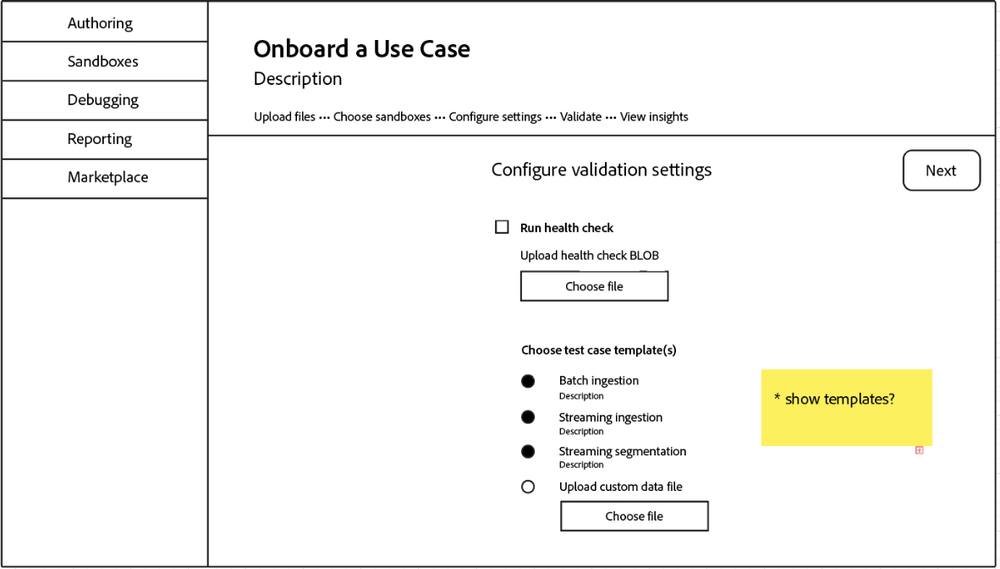
ProblemUsers cannot monitor more complex steps of the authoring workflow.SolutionSeparate the deployment steps of the workflow into their own UI component.Thought ProcessAs noted earlier, addressing this problem required further clarification of the distinctions between authoring and deployment. Given that deployment triggers the testing and validation steps, it made sense to enable users to start and monitor this process manually. In the current design, users deploy the package from the actions dropdown and see deployment results by clicking ‘View details.’ Meanwhile, 'Upload files' and 'Configure settings' were streamlined into a single form accessible via the 'Create a use case' button. | 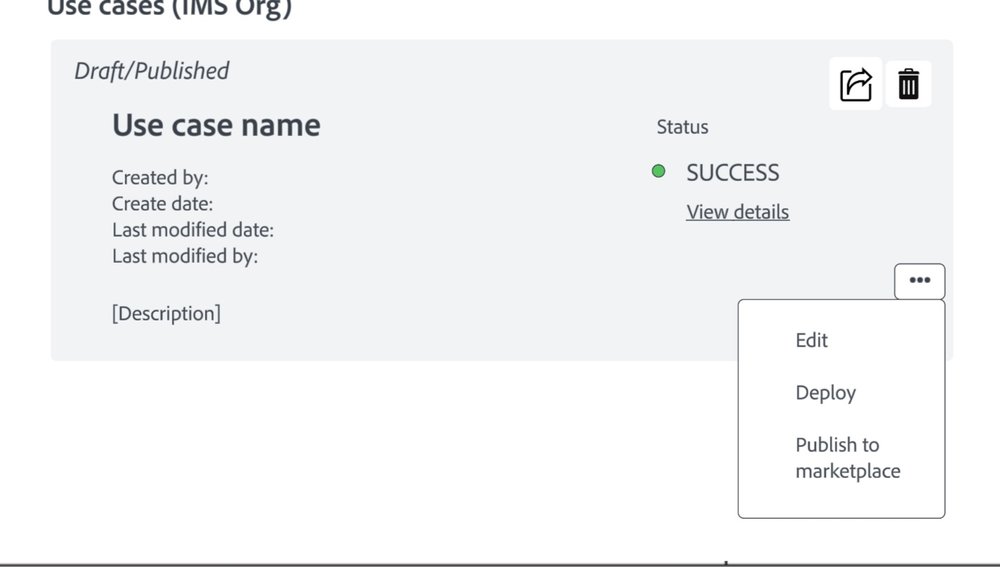 | 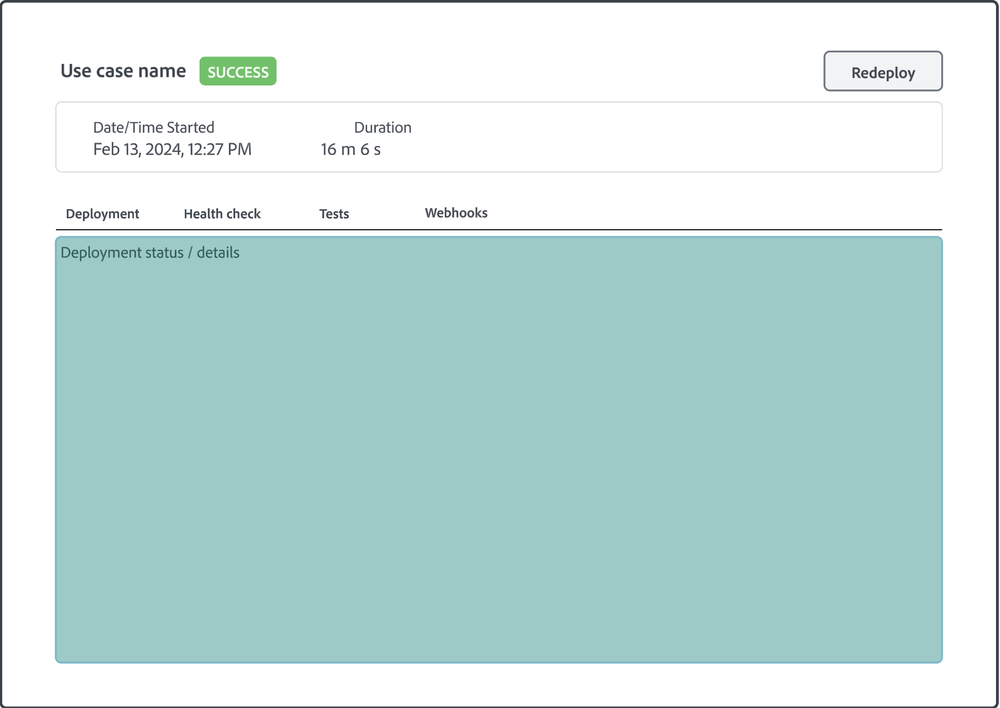 |
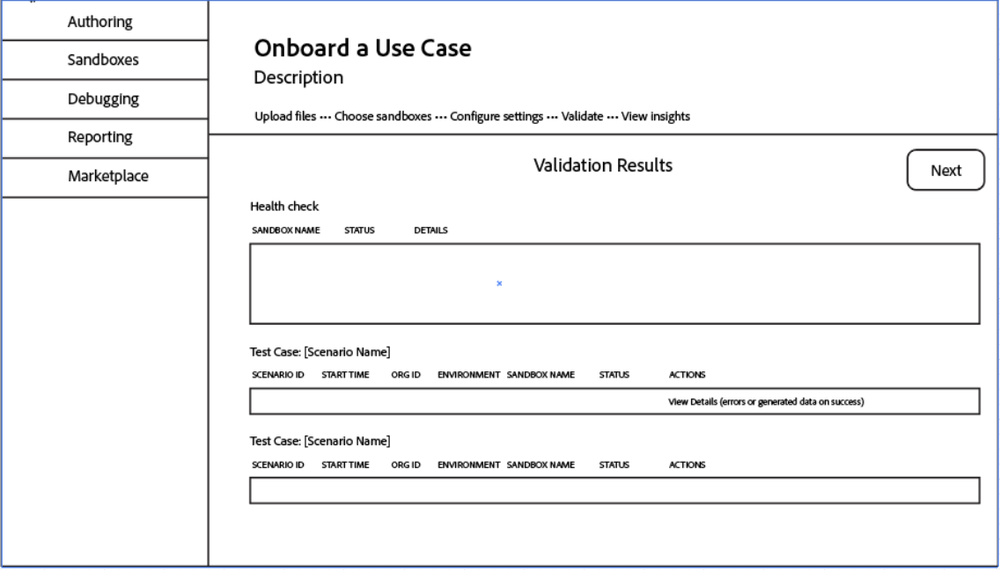
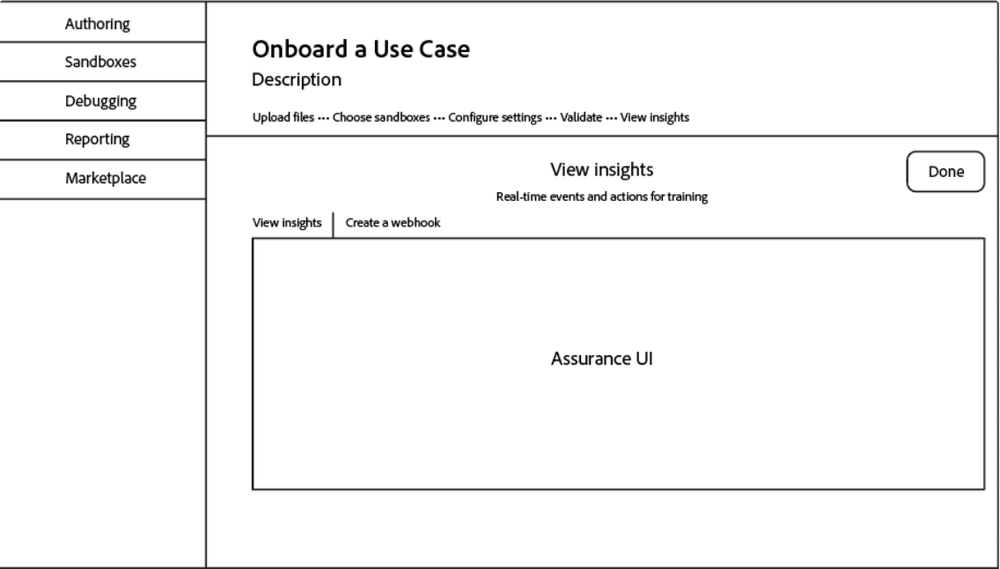
ProblemThe ‘Validation Results’ section does not scale to the amount of data in deployment.SolutionSeparate each deployment step into its own tab or page.Thought ProcessDeployment triggers several processes, including the health check, testing as a service, and web hook events. Each process generates a large amount of data that is pertinent to the user. In Version 1, all these steps were consolidated on a single page, requiring users to scroll through it painstakingly to review results. In Version 2, I introduced separate tabs for each step and an overview panel at the top displaying the start date and duration of the process (this was vague since ‘Webhooks’ does not have a definitive end). In the current design, I opted to represent these steps as individual buttons, each providing key information relevant to its process. Clicking on a button reveals the detailed data for that specific step to the user. |  |  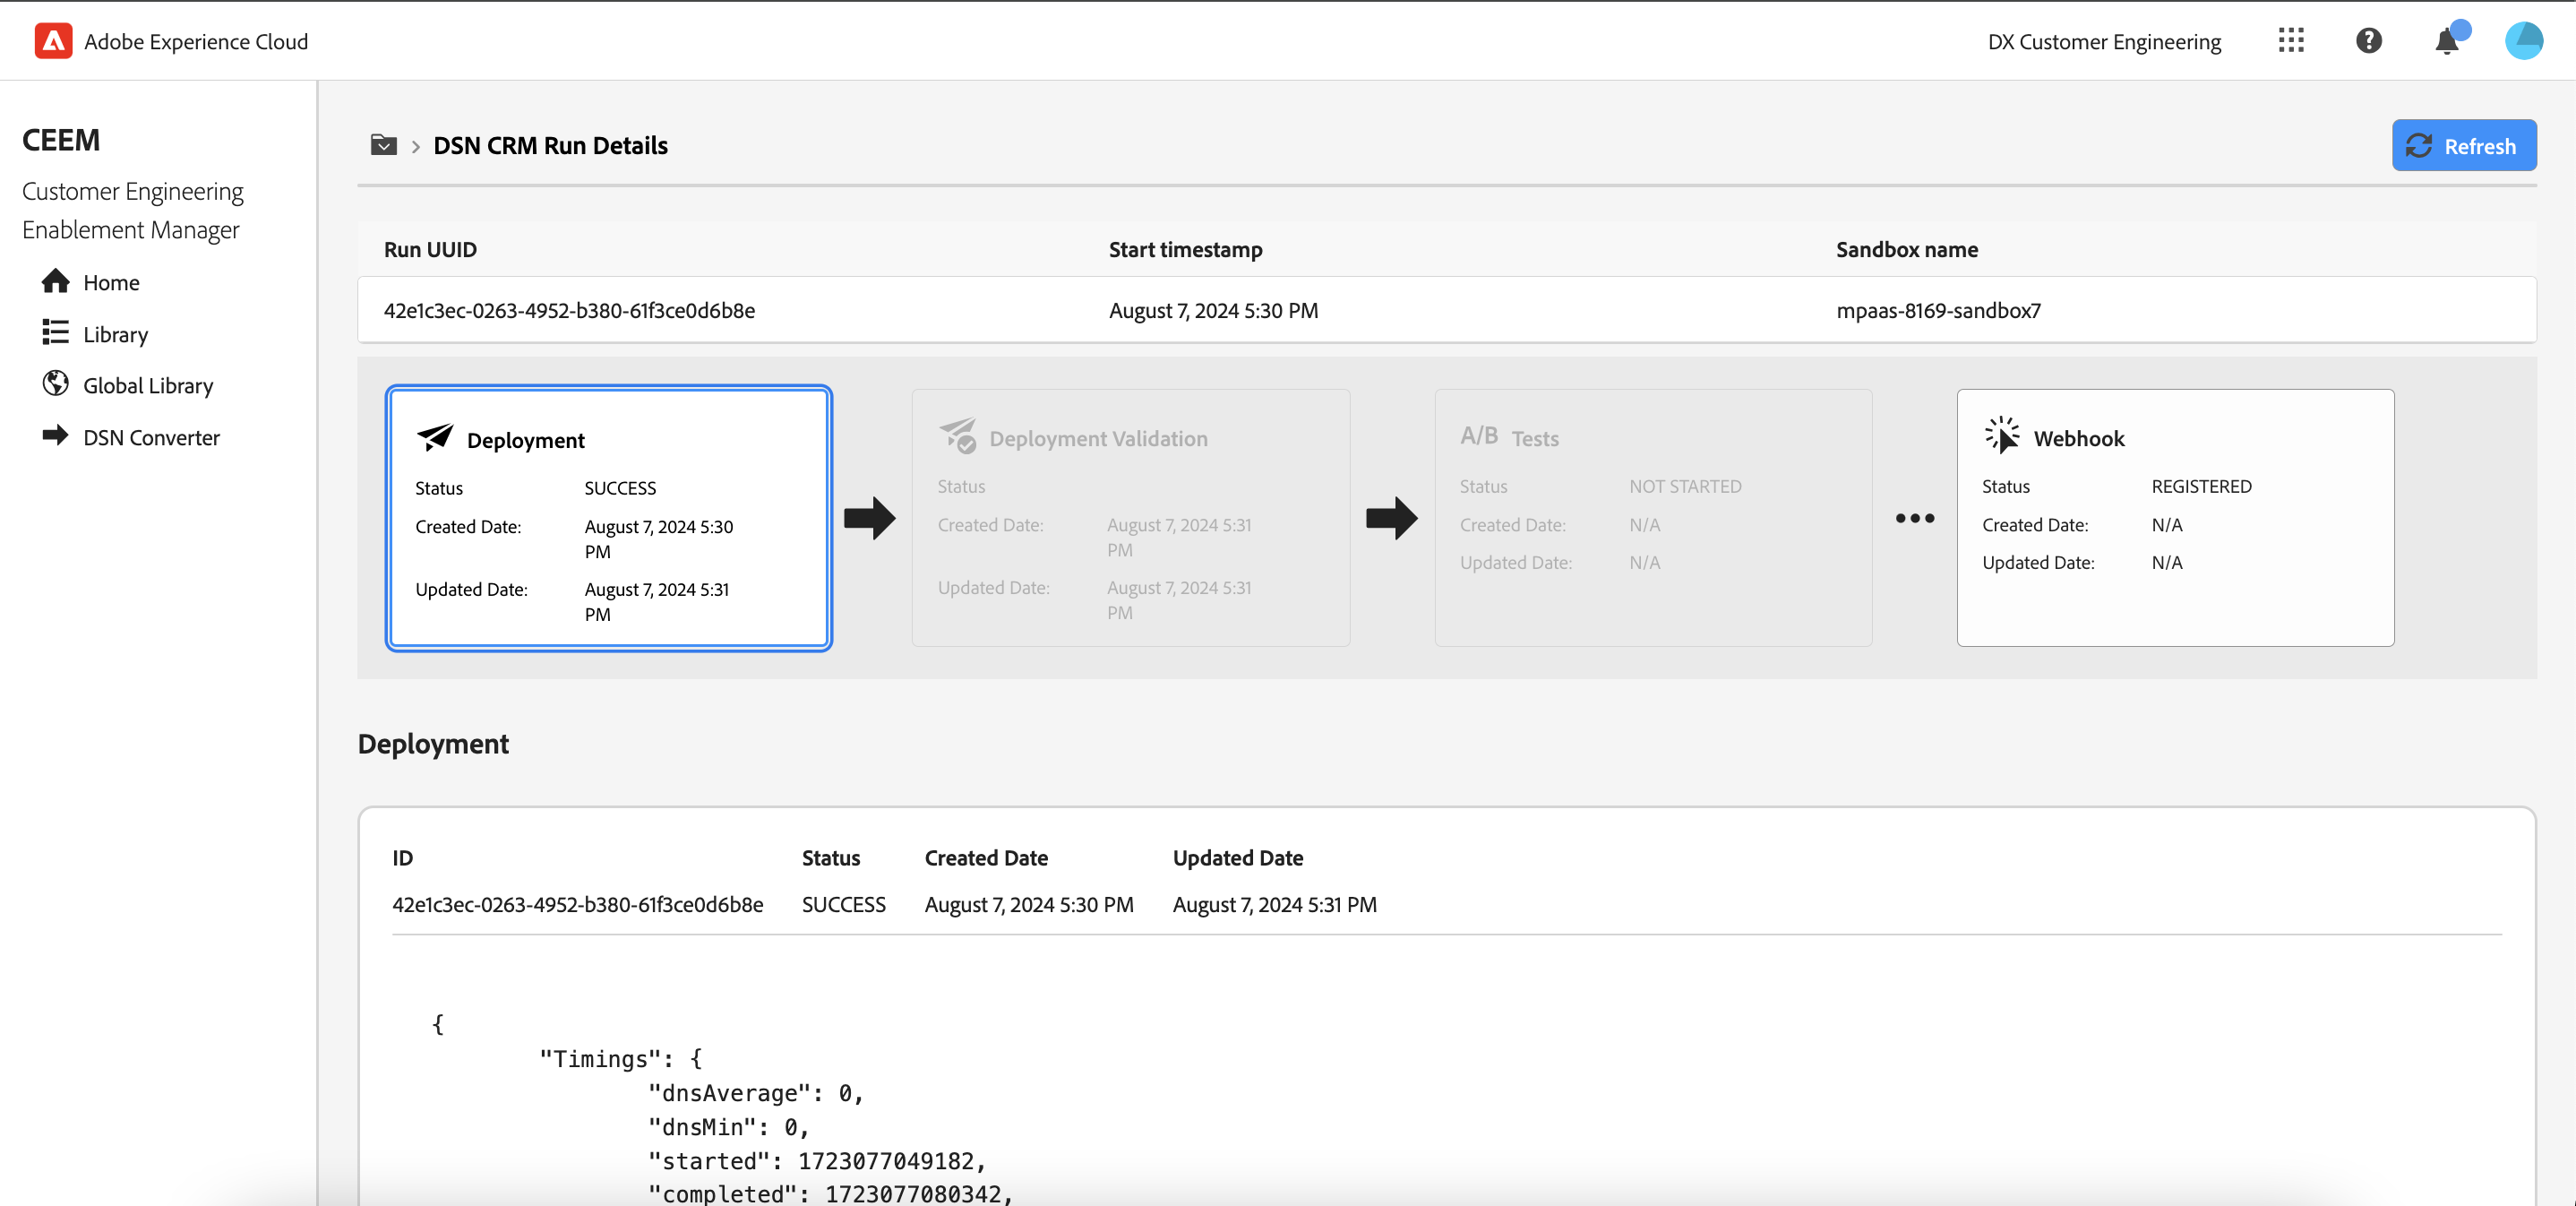 |
Current Design
Future Improvements


